All about Rendering Lard
Lard is a bit of a mystery to most people, but don’t let it intimidate you. If you have ever cooked bacon, you can render your own lard! We offer pre-ground pork fat, which makes it even easier than ever to render lard at home. It’s seriously as easy as melting butter!
There are many ways to accomplish rendering lard, depending on how much time you have and how fast you want the final product to be available. Here is an article with more information that you might care to know about lard–where it comes from, how to make it, and what to do with it. We love pork fat at Shady Grove Ranch. Perhaps after reading this, you will, too!
A Note on Fat Type
Not only do we need to distinguish between what animal from which you get fat for rendering, we also need to talk about where on the animal that fat comes from. Though all food animals have some kind of fat to offer, I’ll limit the discussion to the two I’m most familiar with.
Beef Fat
When a person purchases raw beef fat (called “suet”) for rendering, it most likely comes from the fat surrounding the kidneys (“leaf fat”). It is true that a well-finished cow will store fat under the skin, but meat packers typically hang a beef carcass for a period of weeks, and the fat will develop strong flavors as it ages and dries out. This part of the fat is usually discarded. The kidney fat, however, can be harvested immediately after the kill, and can be used for consumption.
Beef kidney fat is rendered into “tallow” and is highly saturated and is the most stable fat for frying. It will be brittle and crumbly at room temperature, and very hard (like chocolate) when refrigerated. It makes a very firm soap because of its highly saturated nature. It is great for sauteing foods and frying, though it does have a beefy flavor. Beef fat is number 1 in my book for making french fries. Best. Fries. Ever. It is not pliable enough for use as shortening.
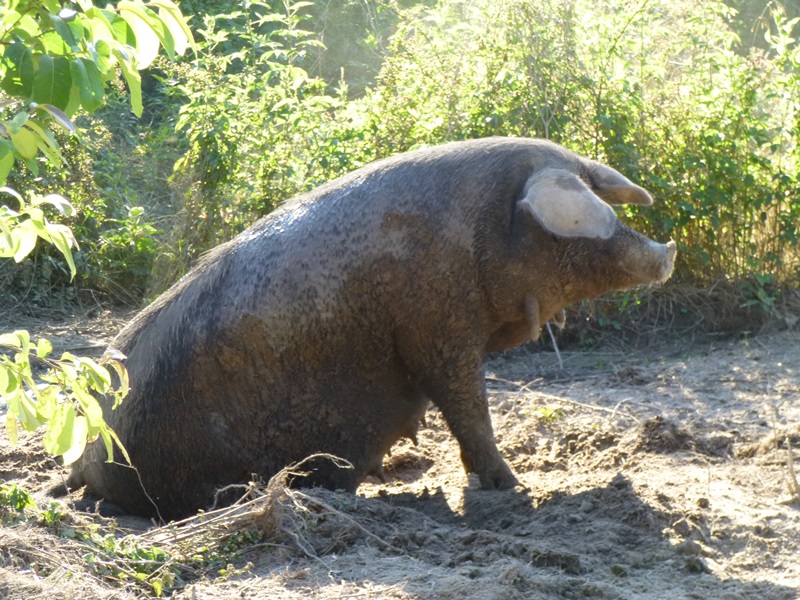
Pork Fat
Most folks don’t realize that pigs have two types of fat to offer for lard-making. Subcutaneous fat or “back fat” is stored under the skin, and I suspect it contains the most vitamin D, since that is where the piggies manufacture it. All farms are different, but at Shady Grove Ranch, our “ground pork fat” is almost always pork back fat. We also offer sliced back fat, but if you’re rendering your own, I recommend purchasing the ground pork fat, since the work of chopping it into bits has already been done for you, and that will make rendering go faster. Sliced back fat is good for sausage-making or creating lardon sticks and other culinary delights.
Now that is a fat pig!
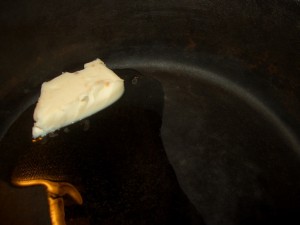
The rendered fat product is called “lard.” Depending on the pig’s diet, back fat lard will be soft and pliable, like softened butter, even when cold. Pork back fat tends to contain a lot of oleic acid (the same stuff as in olive oil) and could be considered a monounsaturated fat.
Pork kidney fat (also called “leaf fat”) is more saturated and will be flaky and firm when cold, yet still pliable enough to use as shortening. It is the ultimate pastry-making fat. It will produce tender, flaky pastries will little skill on the part of the cook. We sell the leaf fat whole so we can easily distinguish between that and the ground back fat.
How to Render Lard
Method 1: Stove-top Rendered Lard (My Favorite)
Pros:
Faster method
Higher white lard yield
More adaptable to batch size (Can do very small or very large batches)
Cons:
Requires more attention
Higher risk of burning
Takes up stove space
Need lard RIGHT NOW? This is my favorite method because it’s so quick! But it is a little higher maintenance because you have to stir it occasionally and you have to keep an eye on your temperature.
Place thawed, chopped/ground fat into a heavy-bottomed pot, skillet, or dutch oven and place over low heat. The idea here is basically to get the liquid fat melting out of the fat chunks ground product without burning the connective tissue. Once you see a good amount of liquid fat (it will look like oil–technically that’s what it is!) at the bottom of your pot, you can start upping the heat to speed the process. Or not.
I never go much higher than medium heat. The connective tissue (“cracklin'”) will sizzle a bit, but it shouldn’t sound like you’re deep-frying something. You want to heat the tissue enough to melt out the fat, but if you go too hot and the connective tissue starts to brown, the lard will begin to taste porky. That’s ok if you only plan to fry things or saute eggs or veggies, but if you want to use the fat for pastries, brownies (yes, we do that!), etc, you’ll need to avoid cooking the cracklin to preserve a nice, clean flavor.
Eventually the pan will fill with clear liquid fat, and the connective tissues from the ground pork fat will shrink up and turn brown. These are cracklings. Start dipping out the liquid fat with a ladle and put it into your storage container. I usually strain mine with a mesh strainer. There will be a teensy bit of residual liquid in the hot fat, which will settle out to the bottom of the container as the lard cools. More on that later.
Stove-top method summary:
Cook thawed chopped/ground fat over low heat in a heavy pot until fat melts out. Keep heat low to keep lard white and clean-tasting. Strain liquid fat before storage.
Method 2: Crock Pot Rendered Lard
Pros:
Easier, hands-free method
No pot on the stove
Can be done overnight
Cons:
Very slow method
Lard will tend to be darker and taste porkier
Everyone loves crock pots because you turn them on and then don’t think about what’s in them until you smell the delicious aroma of your finished meal. Lard won’t give off an amazing aroma, but it will be some of the most delicious and versatile cooking fat you’ve ever used!
Place thawed ground/chopped fat along with a small amount of water (1/8-1/4 cup per 5 lb fat) into your clean crock pot, replace lid, and turn to low. After about an hour, the fat should have begun melting out of the connective tissue. Stir it up a bit, and check it again after another hour or two. By this time, the cracklings should have mostly settled to the bottom of the crock and you should have a lot of clearish fat. Ladle this into your storage container through a strainer, then replace the lid and continue cooking the remaining cracklings on low until they are brown and crisp and most of the fat is liquified.
The remaining lard will be fairly dark and should not be used for pie crusts for sweet pies. It will have a notable porky flavor and complements savory dishes.
Crockpot method summary:
Cook thawed chopped/ground fat over low heat in a covered crockpot until fat melts out. Should take from 2-4 hours. Strain liquid fat before storage.
What to do with Cracklin’
We don’t always go to the trouble of preparing cracklin’ to eat ourselves (we have plenty of farm dogs, after all), but it is a treat! After you’re done rendering the liquid fat out of the connective tissue in your the raw fat, what’s left are brownish bits that will cook down to a crispy, baconey snack that can be seasoned with salt, cayenne, garlic, etc, and used as bacon bits, added to quiche, scrambled eggs, biscuits, stuffing, or just eaten as a snack.
Cook them in a skillet over medium-low/medium heat, seasoning to taste, and frying in their own fat until crisp. Or just feed them to the pups or chickens. We find that our dogs like them slightly salted. If your dog isn’t used to table food, ease them onto this high-fat treat.
Storage Options for Rendered Lard
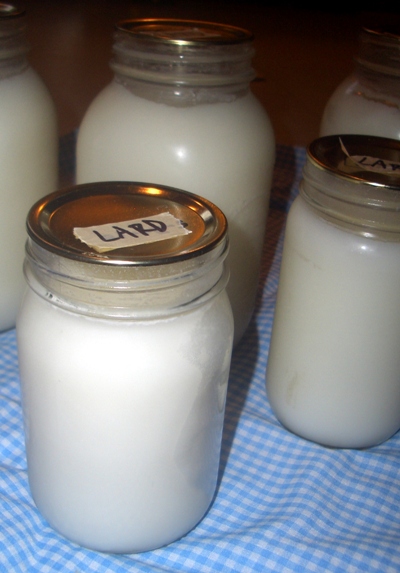
I usually ladle the liquid fat through a sieve so I don’t have to waste time avoiding any bits of cracklings. Once you see liquid fat, you’ve successfully rendered lard. Here are 3 ideas for storage:
- You can either put it straight into your deep-fryer and make some amazing french fries for lunch while the fat is still hot (you are so efficient!).
- You can put it into mason jars for freezer or fridge storage. If you’re really careful not to include cracklings or any water in your jars, you could even leave them on the counter where they should keep for several weeks at room temperature.
- Pour the liquid fat into a large metal bowl and refrigerate until solid. Pop the cold fat disk out of the bowl and scrape off the jello from the bottom. Now you have pure fat. You can break this into storable bits or wrap the whole thing in plastic wrap and keep it in the fridge.
- My favorite storage method is to ladle it into a glass 9×13 baking pan. I then chill the pan in the fridge until the lard is solid. Then I slice the lard into bricks and pop them out with a spatula and wrap them with wax paper or plastic wrap and put them into the freezer. They are easier to store this way than in jars, and they thaw quickly for use in pie crust, frying, etc.
Using Rendered Lard and Tallow
Here comes the fun part! Now you have your wonderful pure fat and you’re ready to use it. Here are some uses that I have discovered:
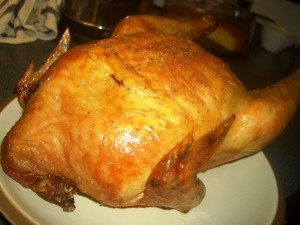
- Baste meat. Lard-basted chicken is delicious and easy!
- Use in place of shortening. Home-rendered lard contains no trans fat and if from pasture-raised piggies, will contain a lot of vitamin D. Eat it!
- Use in place of oil. Brownies? Cakes? Biscuits? Sauteing? Tortillas? Tamales? Use lard instead of vegetable oil. It’s more stable at high temperature and isn’t made from genetically-modified crops. Grease your pans with it. Season your cast iron with it.
- Use for frying. Since lard is quite stable at moderately high temperatures, it can be used for any frying application you might have. (Yes, we’ve even made donuts with it!)
- Use for skin care. Chapped lips. Cracked hands (we have lots of this in the winter on a farm!). Diaper rash. Sore breastfeeding parts. Dry skin. Wrinkles. Cradle cap. Yes. We’ve done it all. We love lard.
- Hair conditioner. Just be prepared to wash your hair several times afterward.
- Candles and soap. Supposedly in the days before electric lights, pigs were raised primarily for their fat for candle-making. The meat was just a by-product!
- Use as grease for mechanical applications.
- Use it for biodiesel. Yes. We plan to do this some day. Pork Truck.
Jerica… I rendered my first batch of lard today using method 1 (in my largest cast iron skillet). It came out superbly. I used the baking pan method to set the lard up for cutting, wrapping, and freezing. (Was going to use Mason jars until yesterday’s foolish mistake of filling my jars too full of broth… Lost 1/2 a batch of fresh broth. Yeah, I know better; senior moment.)
Anyway, I thought I’d add a comment to say what I did different. I lined my strainer with a square of flour sack cloth that I use in processing ghee (aka: clarified butter). Here’s a link to the cloth I chose (it’s the perfect thread count):
Flour Sack Towels Commercial Grade 28in X 29in (12-Pack)
Upsides:
1) virtually pure lard
2) you can use your ladle to press on the top of the stuff in your strainer and express more lard resulting in a more efficient recovery without fear of pushing “stuff” into your lard.
Dear Sirs:
I have some food concerns that have interested me in cooking with leaf lard. Do you sell this? I guess it would be the fat we call pork kidney fat, that is internal fat as opposed to back fat. If I can obtain this fat called leaf fat, I can render it out and obtain me some pure farm source leaf lard.
Lewis Bishop