
Roast Chicken is my go-to method for cooking chicken. It is easy, very low hands-on time, and always comes out delicious with crisp, flavorful skin all around and nice, moist breast meat. Plus I end up with excellently flavored chicken backs and drippings to add to my next batch of chicken broth.
Here’s what you need to make an excellent roast chicken
1 whole pasture-raised chicken, thawed.
0.5-1 tsp coarse sea salt per pound of chicken (e.g. 2-4 tsp for a 4 lb bird depending on the saltiness of the salt and your preference for salt level)
3-4 Tbs. rendered lard or melted butter
Glass baking dish (like Pyrex)
Stainless cookie rack or roasting rack
(If you have a real roasting pan, use that. I just use what I have.)
1 strong set of metal tongs (you’ll be lifting the chicken once with these)
Optional: Insert a quartered onion and/or fresh sprigs of rosemary, sage, thyme, oregano, basil, etc, into the body cavity of your chicken. I rarely do this just out of laziness, but it does add nice flavor.
Adjust your oven’s shelves to accommodate the chicken and the roasting dish. Preheat the oven to 400F. Situate the cookie rack in or on the baking dish so the surface is level and secure. Place the chicken breast-side down on the rack and sprinkle sea salt all over it and inside the cavity.
Place the pan in the oven and roast for 15-20 minutes. Remove from the oven and brush the chicken with the lard or butter on all exposed surfaces and return it to the oven.
Continue baking for 30 minutes, then remove the pan and carefully flip the bird to breast-side-up with tongs. Baste again with the remaining lard or butter and return it to the oven.
Continue baking until a thermometer reads 180F and until the juices start to die down (see below). For a 4 lb bird, this will be another 15-20 minutes.
How to tell when your roast chicken is really done
I stopped relying on a thermometer, because often I would get a reading of 180F but would still have pinkish meat that wasn’t all the way tender. Not unsafe, just not as tasty as it could be.
My trick is to watch the juices. Many recipes instruct you to stop cooking when the juices are clear and you get a 180F. Not so for our chickens. The juices will go from pinkish to clear as the bird cooks, but if they are clear but still bursting out upon poking, the chicken is not yet done. Cook until the juices begin to slow and just barely come out when freshly poked. Be sure not to poke the skin in the same place when doing the juice test.
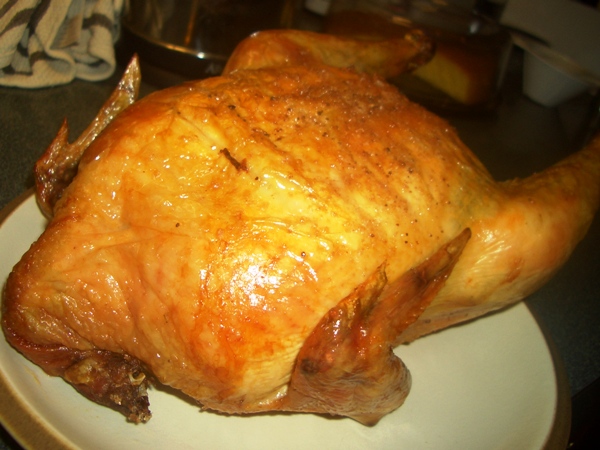
And here is the end result! A perfectly browned and crispy, juicy roast chicken!
Easy, practically-hands-off roast chicken